System user
By default, Ubuntu Core images run a program called console-conf when they’re first instantiated on a device.

As shown above, console-conf is a text-based menu system that uses a connected keyboard and display, or a serial connection, to configure a device’s network connection and to add a user. A user is added by entering an Ubuntu SSO registered email address with one or more registered SSH keys. This user can then access the device over SSH to perform various management and configuration functions.
Some systems, however, suppress console-conf and its user creation.
To create a system user on these systems, a system-user assertion needs to be embedded within a file called auto-import.assert that’s added to the system via the root directory of a removable USB storage device. This process is covered below.
A managed system already has a user account whereas an unmanaged system does not. A system user cannot typically be added to a system that is already managed.
Creating users with auto-import.assert
The snap daemon can import account, account-key and the new system user as a stream of assertions in auto-import.assert from an external USB storage device. If those assertions are valid for the given system, a system user is created. After this, you can log into the device (locally or over SSH) using the username and password defined.
While auto-import.assert can be created manually, it’s far easier to use the make-system-user snap. This creates the file containing the assertions for account, account-key and the new system user automatically, and requires only the following:
- the
brand-idandmodelfields taken from a device’s model assertion - access to the key used to sign the new assertion
Inside model assertions
Creating a valid system user assertion is limited by the model assertion which contains store account ID defined as brand-id and authority-id, alongside the model name, model.
If your device is built from an image created from your own Custom model assertion, then you should already have access to these values.
The following is an example a custom model assertion showing bJzr2XzZg6Qv6Z53dsjhg20975Skjs as the account ID and mymodel as the model name:
{
  "type": "model",
  "authority-id": "bJzr2XzZg6Qv6Z53dsjhg20975Skjs",
  "brand-id": "bJzr2XzZg6Qv6Z53dsjhg20975Skjs",
  "series": "16",
  "model": "mymodel",
  "architecture": "armhf",
  "kernel": "pi2-kernel",
  "gadget": "cm3",
  "timestamp": "2021-01-11T15:55:59+00:00"
}
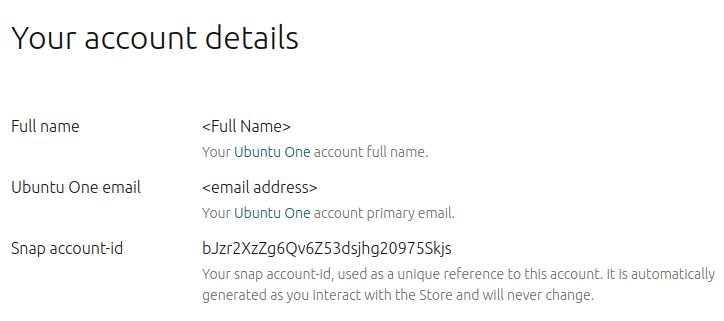
Another source of the store account ID is the Snap account-id from https://dashboard.snapcraft.io:
When a model assertion lacks a system-user-authority field, the system user assertion can only be signed by:
- a key registered to the store account specified by the
brand-idfield (bJzr2XzZg6Qv6Z53dsjhg20975Skjs in our example) - the key that’s part of the account-key assertion when the system-user assertion is submitted to the device
Specifying system-user-authority
The optional system-user-authority field can be added to a model assertion to list a set of account IDs that are authorised to sign system user assertions for any image built with the assertion:
{
  "type": "model",
  "authority-id": "bJzr2XzZg6Qv6Z53dsjhg20975Skjs",
  "brand-id": "bJzr2XzZg6Qv6Z53dsjhg20975Skjs",
  "system-user-authority": [
    "ANOTHER-ACCOUNT-ID",
    "YET-ANOTHER-ACCOUNT_ID"
  ],
  "series": "16",
  "model": "mymodel",
  "architecture": "armhf",
  "kernel": "pi2-kernel",
  "gadget": "cm3",
  "timestamp": "2021-01-11T15:55:59+00:00"
}
Anyone who can log in to either ANOTHER-ACCOUNT-ID or YET-ANOTHER-ACCOUNT_ID accounts can sign system user assertions with keys registered to those accounts. And such system user assertions are valid for systems built with this model.
Self-signed system user assertions
A model can also specify that anyone with a registered key can create a valid system user assertion. This is done with an asterisk ("*") in the system user-authority field:
{
  "type": "model",
  "authority-id": "ACCOUNT-ID",
  "brand-id": "ACCOUNT-ID",
  "system-user-authority": "*",
  "series": "16",
  "model": "mymodel",
  "architecture": "armhf",
  "kernel": "pi2-kernel",
  "gadget": "cm3",
  "timestamp": "2017-07-11T15:55:59+00:00"
}
Generating an authenticated system user assertion
The easiest way to create a system user assertion is to use the make-system user snap, which can be installed on either a classic Ubuntu system or a Core system from either its 20 or 22 track.
-
On Ubuntu 20.04-based systems, install make-system-user from its 20 track:
snap install make-system-user --classic --channel=20/stable -
On Ubuntu 22.04-based systems, install make-system-user from its 22 track:
snap install make-system-user --classic --channel=22/stable
As covered earlier, to create a user assertion you will need access to the following:
- store account ID or
brand-id/authority-id - model name from the model assertion
- the name of the key used to sign the assertion and its passphrase
- username, email address and password for the account you want to create
Currently, make-system-user does not work with Snapcraft 7.x, and Snapcraft 6.x needs to be installed instead:
sudo snap refresh --channel=6.x/stable snapcraft --classic
Before running make-system-user, login to the store with the snapcraft command:
$ snapcraft login
See Snapcraft overview if snapcraft is not installed. To retrieve the name of the key to sign the assertion with, use the snapcraft keys command:
$ snapcraft keys
Name         SHA3-384
my-key-name  E-n0AOKPFjIyy4S_i9JxTT4tkuaZf7rP9D2mBNXjlgTGDjL8euFSlb87U0NPl
See Signing a model assertion for details on creating and uploading keys.
Running make-system-user
Here is a sample execution matching the above:
make-system-user --brand bJzr2XzZg6Qv6Z53dsjhg20975Skjs \
--model mymodel --key my-key-name --username <new-user-name> \
--email <new-user-email-address> --password <new-user-password>
After asking for the passphrase for my-key-name, the above command will generate output similar to the following:
Done. You may copy auto-import.assert to a USB drive and insert it into an unmanaged Core system, after which you can log in using the username and password you provided.
The result is auto-import.assert in your current directory. This can be used on any qualifying image (described above) that is not already managed to make a system user.
Simply copy auto-import.assert to the root directory of a USB drive, insert it, and the system user is created.
Tip: If you are creating the system user on the first boot, it may take some minutes for the assertion to be imported and for the system user to be created.
Checking the system user assertion
If you can log in with the username and password, the system user has been created.
You can also use the snap known system-user command. If there is a system user, the signed assertion is output.