Getting started
Ubuntu Core is ideal for IoT (Internet of Things) and embedded systems because it manages itself. Whether it’s running on a Raspberry Pi hidden for media streaming, or a Qualcomm DragonBoard tucked away in a garage to handle automation, Ubuntu Core handles application and security updates autonomously.
Ubuntu Core runs on an extensive (and growing) range of hardware, and pre-built images are available for amd64 and Raspberry Pi reference platforms. Installation on a reference platform is easy and a great way to get started with Ubuntu Core, or to explore Ubuntu Core’s features and evaluate its potential.
While Ubuntu Core can operate much like a traditional Ubuntu installation, its installation, management and deployment is directed by its snap foundations, as outlined below.
| Requirements | Choose a release |
| Installation steps | Raspberry Pi installation |
| Testing Ubuntu Core with QEMU | Using Ubuntu Core |
Note: See Supported platforms for more details on which images are available for which platform, and What is Ubuntu Core for more general details.
Requirements
Alongside enough storage to hold the Ubuntu Core image, installation on a Raspberry Pi also requires a screen and keyboard to navigate a few installation prompts (these aren’t needed post-installation).
Additionally, you will need an Ubuntu SSO account with associated SSH keys. This setup is required because, after Ubuntu Core has been installed, Ubuntu SSO is used to log in to your device. For help generating and importing SSH keys, see the Ubuntu community wiki.
When Ubuntu Core is up and running, if you want to access your device remotely, you’ll need an SSH client for your operating system. Linux and macOS both have clients built-in, whereas Windows users could use Ubuntu on WSL.
Choose a release
Ubuntu Core releases track a corresponding Ubuntu LTS release, and there are currently four supported versions: Ubuntu Core 22 (UC22), Ubuntu Core 20 (UC20), Ubuntu Core 18 (UC18) and Ubuntu Core 16 (UC16).
Ubuntu Core is more than a repackaged version of Ubuntu; Ubuntu Core 20 and 22, for example, offer full-disk encryption (FDE), new recovery modes and Raspberry Pi ARMv7 and ARMv8 support.
Below, we cover installing a reference image of the latest version of Ubuntu Core (UC22) on a Raspberry Pi.
Installation steps
The typical installation procedure for UC22 is as follows:
-
Download the preferred Ubuntu Core image for your device:
See Supported platforms for links to device support and images.
By default, images are compressed withxzand can be expanded with:$ xz -d <image-name>.img.xz. -
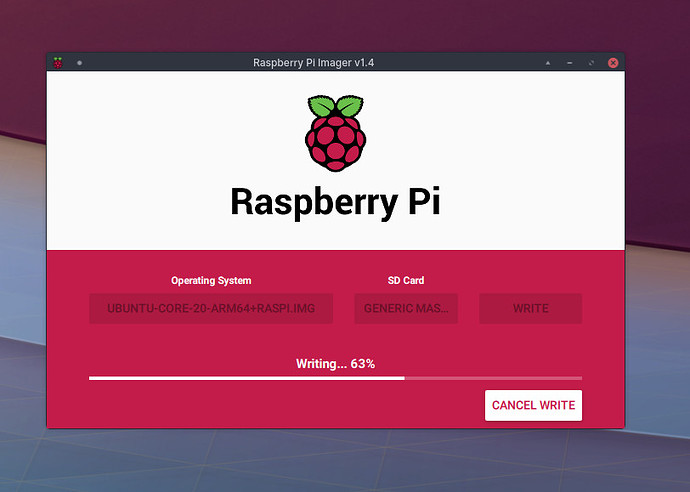
Write the image to your device’s storage medium (eg. SD card for Raspberry Pi):
We recommend using Raspberry Pi imager for Windows, macOS and Linux. You will need to select Use custom as the operating system, and use the file requester to select the image you just decompressed. -
Boot the device from the flashed storage and follow the on-screen prompts:
This step is version-specific, but the installation typically asks only two questions.
After installation, see Using Ubuntu Core for a quick overview of how to work within the Ubuntu Core environment.
Raspberry Pi installation
To install UC22 on a Raspberry Pi, for example, first download the image for your device from http://cdimage.ubuntu.com/ubuntu-core/22/stable/current/.
Write the Ubuntu Core image to the SD card destined for the Raspberry Pi. As mentioned above, Raspberry Pi imager is a good tool for this.
With the image written to the SD card, connect the Raspberry Pi to a screen and keyboard, insert the SD card and power on the device. After a brief initialisation period, “Press enter to configure” will appear on the display.
Press enter to continue. The display will update to show some Ubuntu Core introductory text and a prompt to set up the network and administrator account. Press tab or cursor down to highlight OK, and press return to move on to the next step.
The next step configures the network connection. The default options will configure the ethernet port to use DHCP to connect to your local network. Use the cursor keys to navigate to the network device and ‘Enter’ to change the configuration, or select ‘Done’ to complete the process and move on to the next step.
Finally, enter the email address for your Ubuntu SSO account. This will link the SSH keys registered on the account to the new device deployment and allow you to connect without any further device configuration. The connection details are shown on the next page, and with each successive reboot, alongside SSH host key fingerprints for the device. You can now connect using SSH with your Ubuntu SSO username and the IP address of the device.
Testing Ubuntu Core with QEMU
You can test Ubuntu Core without specific hardware from within a virtual machine.
To test Ubuntu Core with QEMU (https://www.qemu.org/) on Ubuntu, first install the qemu-kvm package and verify that your system is capable of running hardware-accelerated KVM virtual machines with the kvm-ok command:
$ sudo apt install qemu-kvm
$ kvm-ok
INFO: /dev/kvm exists
KVM acceleration can be used
$
To ensure compatibility with the required UEFI features in Ubuntu Core 22, also install the OVMF package:
$ sudo apt install ovmf
The exact command to run will depend on your host hardware capabilities, such as available memory and CPU cores, but the following should work in the majority of cases:
$ qemu-system-x86_64 \
    -enable-kvm \
    -smp 2 \
    -m 1500 \
    -cpu host \
    -netdev user,id=mynet0,hostfwd=tcp::8022-:22,hostfwd=tcp::8090-:80 \
    -device virtio-net-pci,netdev=mynet0 \
    -drive file=pc.img,format=raw \
    -drive file=/usr/share/OVMF/OVMF_CODE.fd,if=pflash,format=raw,unit=0,readonly=on
In the above command, the Ubuntu Core image is called pc.img and we forward the virtual SSH port 22 to port 8022 on the host, and 80 to 8090 for any web server application you wish to install in the VM. To access this configuration from your host machine, type the following:
$ ssh <your key> <SSO identity>@localhost -p 8022
