Your submission was sent successfully! Close

You have successfully unsubscribed! Close

Limit access to resources by applying quotas

1. Overview

Before you get started!

Welcome to OpenStack!

In this series of tutorials, we will walk you through all the necessary steps to install, configure and get started with OpenStack. Using just your workstation, you will learn how to use OpenStack for cloud infrastructure implementation purposes, from a single-node installation to large-scale clusters.

This tutorial is the eleventh in the “Phase I - Single-node OpenStack on your workstation” series.

Explore other tutorials >

What is OpenStack?

OpenStack is a collection of open-source projects designed to work together to form the basis of a cloud. OpenStack can be used for both private and public cloud implementation.

What is Sunbeam?

Sunbeam is an OpenStack project created to set the foundation for zero-ops OpenStack. By using highly opinionated architecture and native Kubernetes principles, Sunbeam delivers distilled OpenStack excellence on top of K8s.

What is MicroStack?

MicroStack (based on Sunbeam) is an OpenStack flavour designed for small-scale cloud environments, edge deployments, testing and development, with full commercial support available from Canonical.

In this tutorial, you will learn how to:

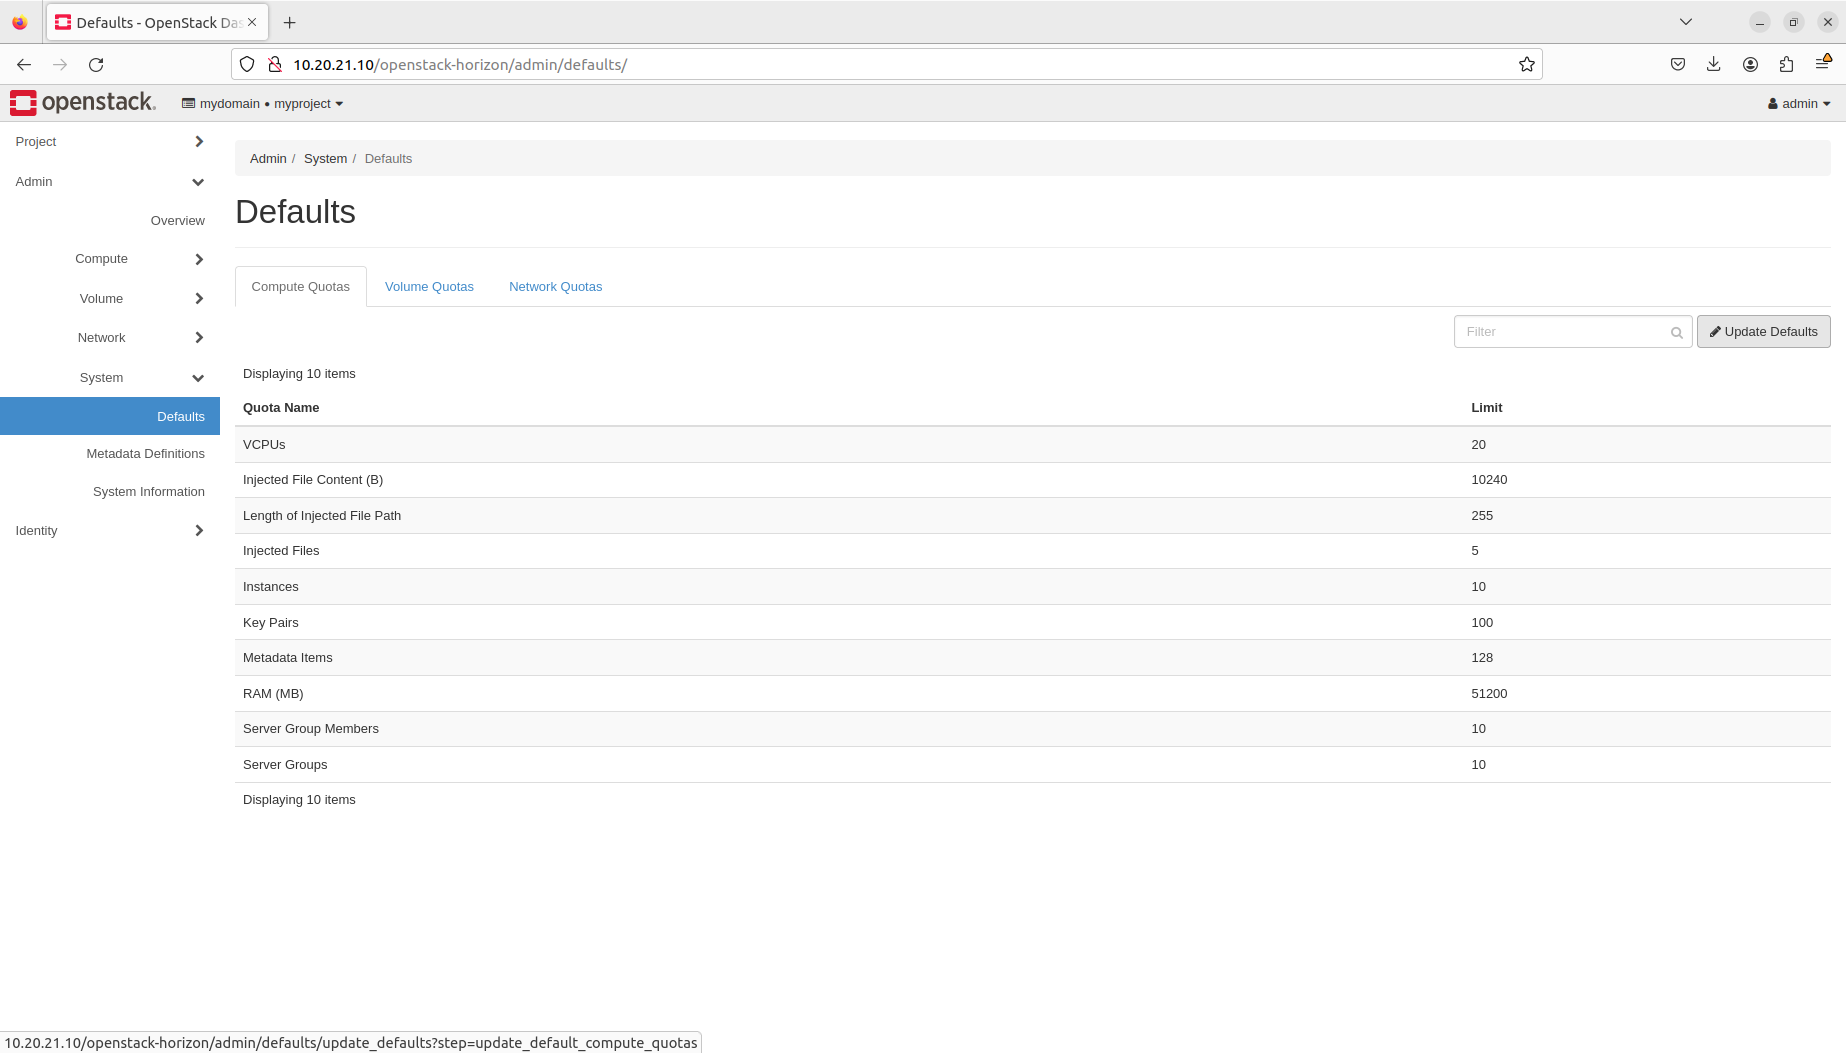
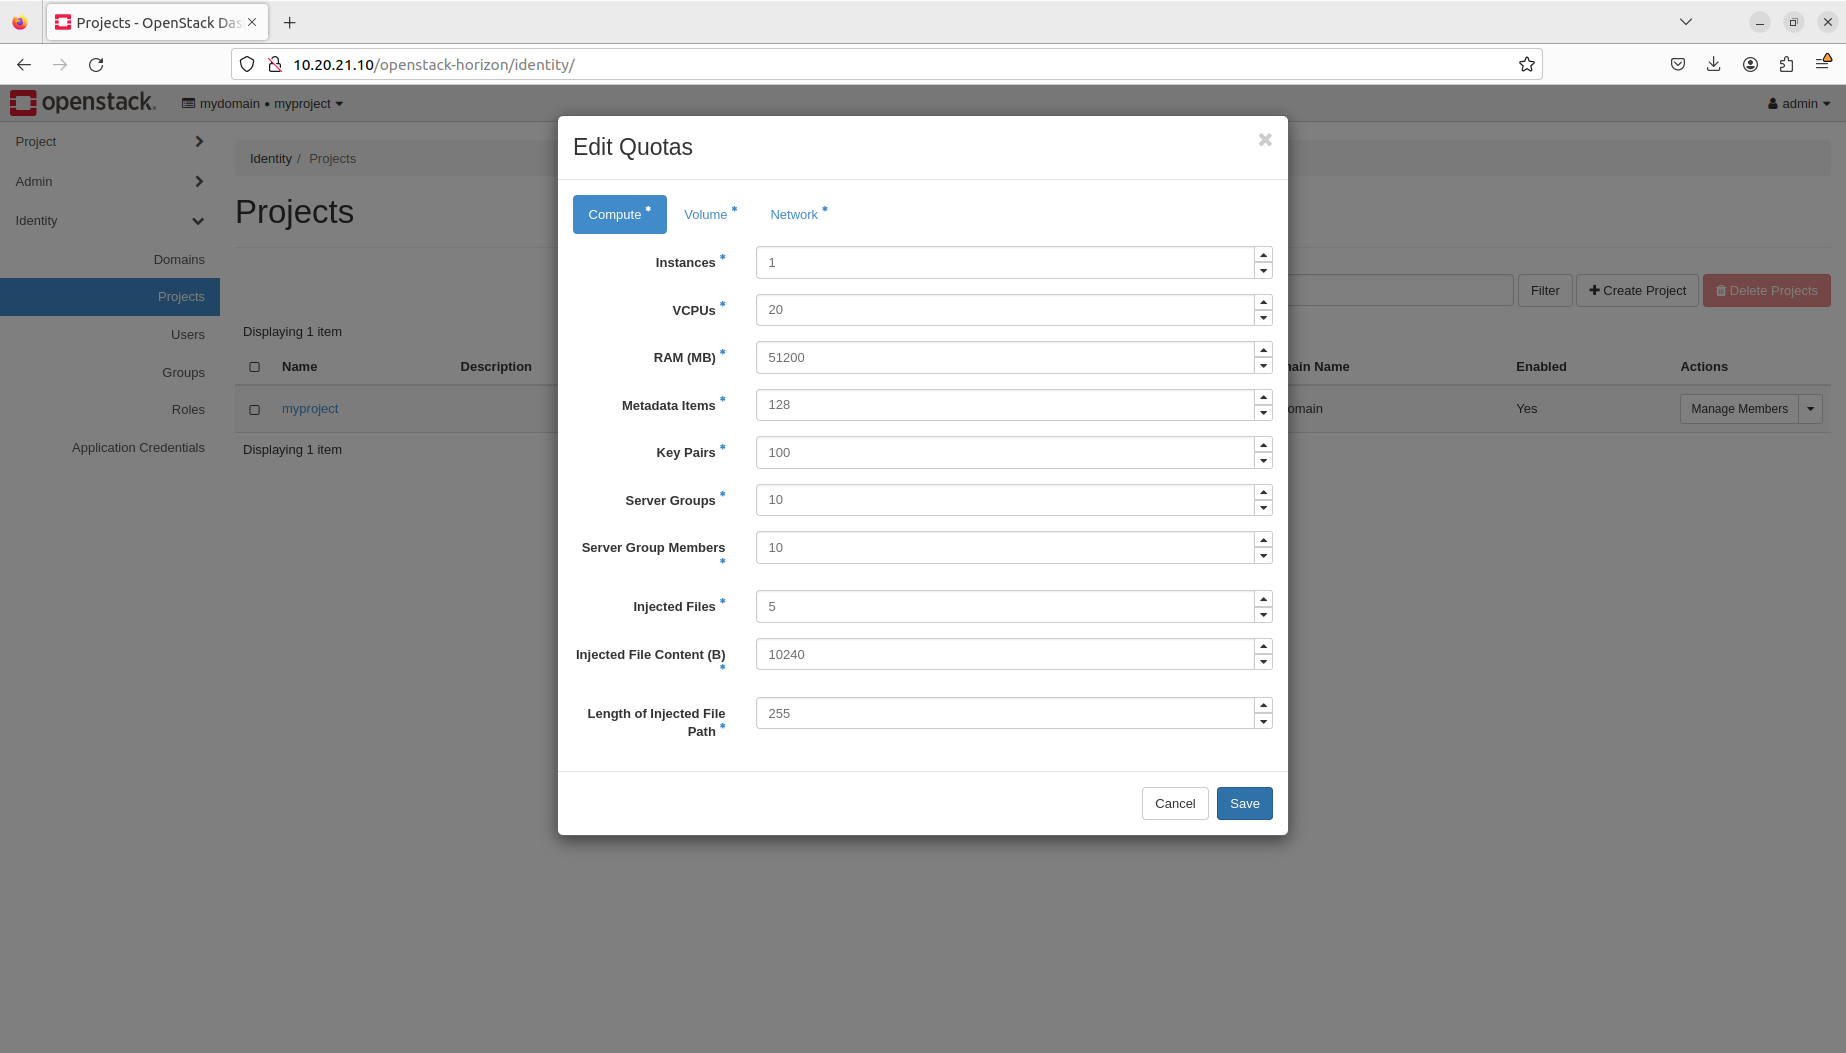
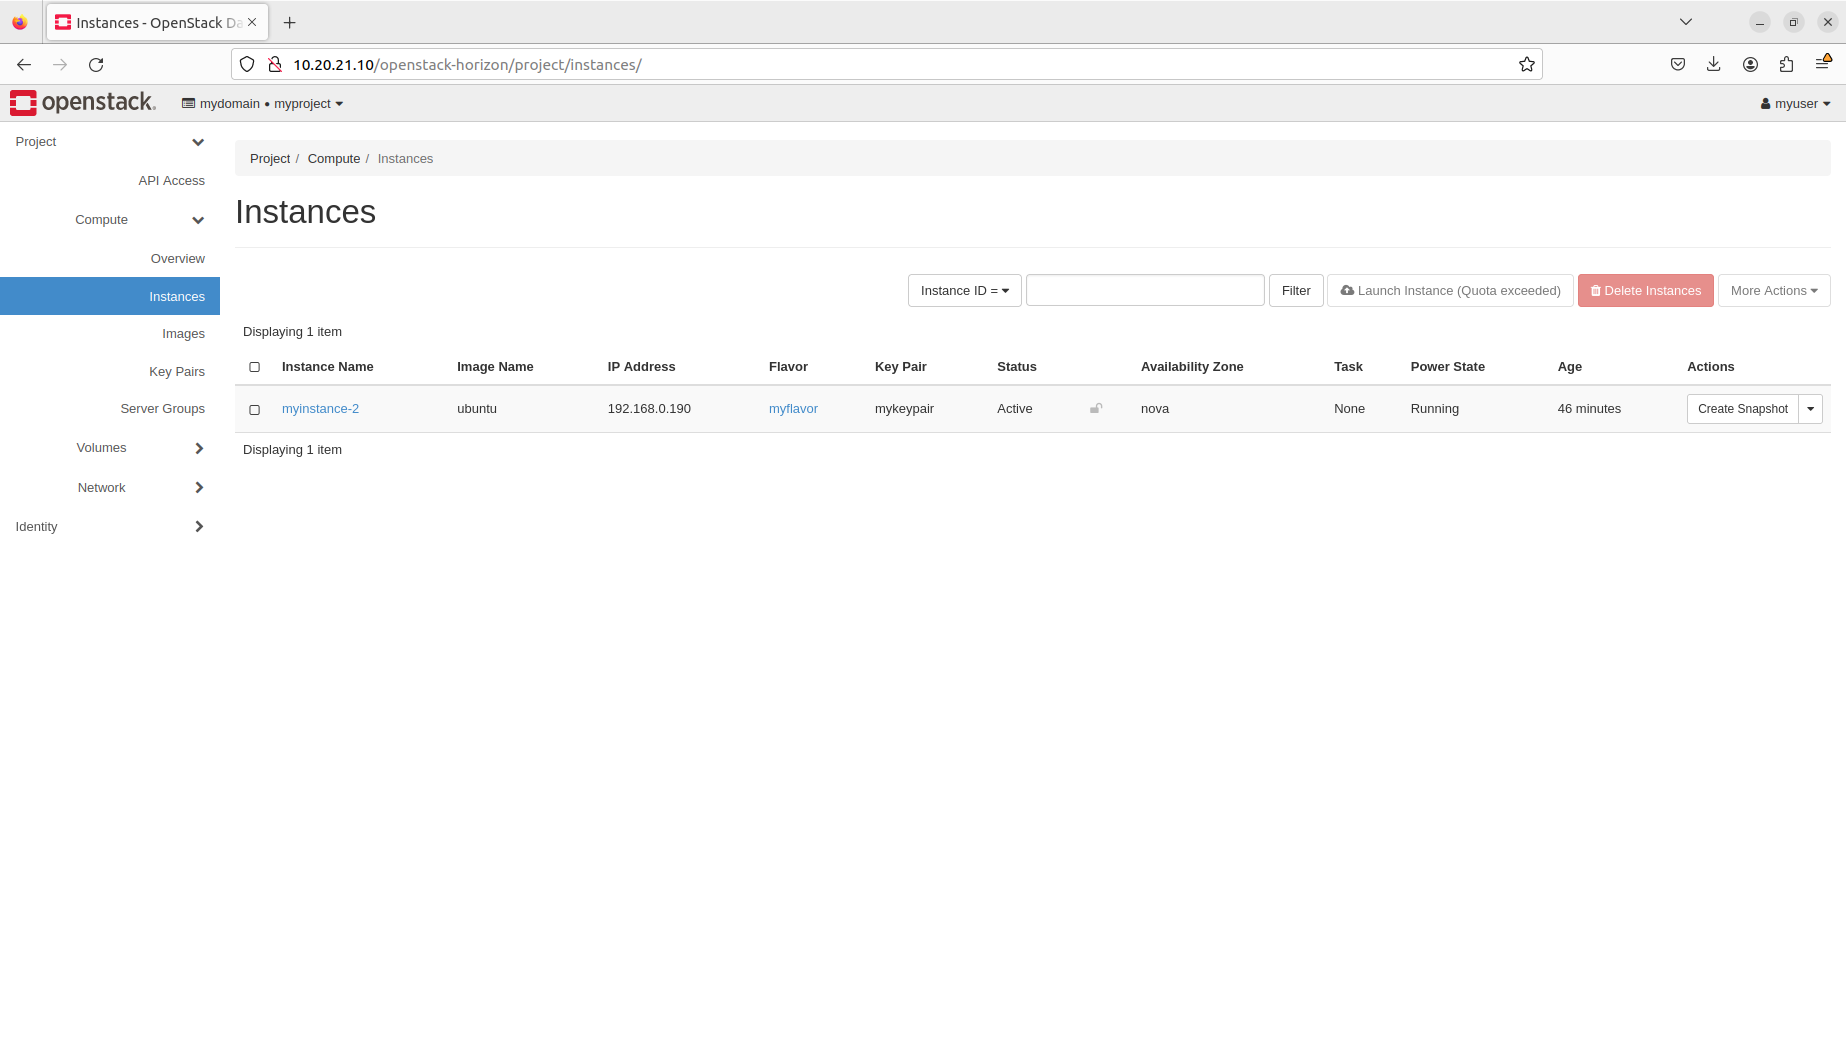
  • Use quotas to limit access to resources in OpenStack
  • Manage default quotas
  • Manage per-project quotas

You will only need:

One fresh physical or virtual machine with:


2. Credentials

Make sure you’re logged in as the admin user we created in tutorial 6. Identities.

To log in as the admin user through the OpenStack client, open a new terminal window, execute the following command and type admin when asked for the password:


$ source ~/Downloads/admin-openrc.sh

To log in as the admin user through the OpenStack dashboard, visit https://10.20.20.1 and use the following credentials:

  • Domain - Type mydomain

  • User Name - Type admin

  • Password - Type admin


3. Manage default quotas

OpenStack supports the concept of quotas, which can limit access to network, compute and storage resources for tenants. Default quotas apply to all projects, but quotas can also be set per project individually. Per-project quotas take precedence over default quotas.

In the following steps, we’ll update default quotas to enable 20 instances per project.

Manage default quotas through the OpenStack client

To list default quotas, execute the following command:


$ openstack quota show --default

To update the default quota for instances, execute the following command:


$ openstack quota set --instances 20 --class default

Manage default quotas through the OpenStack dashboard

Navigate to Admin -> System -> Defaults and click the Update Defaults button on the right on the Compute Quotas tab:

To update the default quota for instances, fill in the form as follows:

  • Instances - Type 20

Then click the Update Defaults button:

1.11.2

You are now able to see the default quota for instances updated in Nova’s database:

1.11.3


4. Manage per-project quotas

In the following steps, we’ll modify quotas for the myproject project to enable only 1 instance.

Manage per-project quotas through the OpenStack client

To update the quota for instances in the myproject project, execute the following command:


$ openstack quota set --instances 1 myproject

To list quotas for the myproject project, execute the following command:


$ openstack quota show myproject

Manage per-project quotas through the OpenStack dashboard

Navigate to Identity -> Projects. Then, under the Actions column beside myproject, select Modify Quotas from the drop-down menu:

To update the quota for instances in the myproject project, fill in the form as follows:

  • Instances - Type 1

Then click the Save button:

Note that the project ID (here f09329bda8ee4f239d7a578420d32791) may be different in your environment.


5. Switch to the “myuser” user account

Make sure you’re logged in as the myuser user we created in tutorial 6. Identities.

To log in as the myuser user through the OpenStack client, open a new terminal window, execute the following command and type mypassword when asked for the password:


$ source ~/Downloads/myproject-openrc.sh

To log in as the myuser user through the OpenStack dashboard, visit https://10.20.20.1 and use the following credentials:

  • Domain - Type mydomain

  • User Name - Type myuser

  • Password - Type mypassword


6. Attempt to exceed quotas

In the following steps, we’ll attempt to exceed quotas for the myproject project by launching another instance. We’ll attempt to launch an instance called myinstance-2 on the ephemeral storage using the ubuntu-jammy image, the myflavor flavor and the mykeypair key pair, attached to the mysubnet subnet with the default security group attached.

Attempt to exceed quotas through the OpenStack client

To attempt to launch the instance, execute the following command:


$ openstack server create --flavor myflavor --image ubuntu-jammy --network mynetwork --key-name mykeypair myinstance-2

Sample output:


Quota exceeded for instances: Requested 1, but already used 1 of 1 instances (HTTP 403) (Request-ID: req-1fe107b8-533d-4136-a7dc-ea09db5d4e65)

Attempt to exceed quotas through the OpenStack dashboard

Navigate to Project -> Compute -> Instances and attempt to click the Launch Instance button on the right. As you can see, the button is grayed out and the (Quota exceeded) message is appended to the button:


7. Next steps